Explore technical guides, industry news, project showcases, and expert insights on commercial solar LED lighting.
A well-lit outdoor sign does more than catch the eye; it makes a message readable after sunset. Solar Billboard Lights can help illuminate storefront signs, roadside displays, and event boards without a nearby power connection. But a bright product photo tells only part of the story. Panel size, battery capacity, beam angle, weather exposure, and mounting height all affect real-world performance.
Solar-energy pioneer Thomas Edison is often quoted as saying, “I’d put my money on the sun and solar energy. What a source of power!” For billboard lighting, that optimism needs a practical check: sunlight varies, and a shaded panel may not recharge as expected. A light that looks powerful on a product page can still leave the sign’s lower edge dim.
This guide compares 10 options for outdoor signs, focusing on useful details rather than headline brightness alone. We consider runtime claims, adjustability, installation, and how well each light may suit different sign sizes. Small details matter. A loose mounting bracket or poorly aimed beam can waste usable light. The picks are a starting point, not a guarantee for every site; actual results depend on local conditions and setup. That part is easy to underestimate.
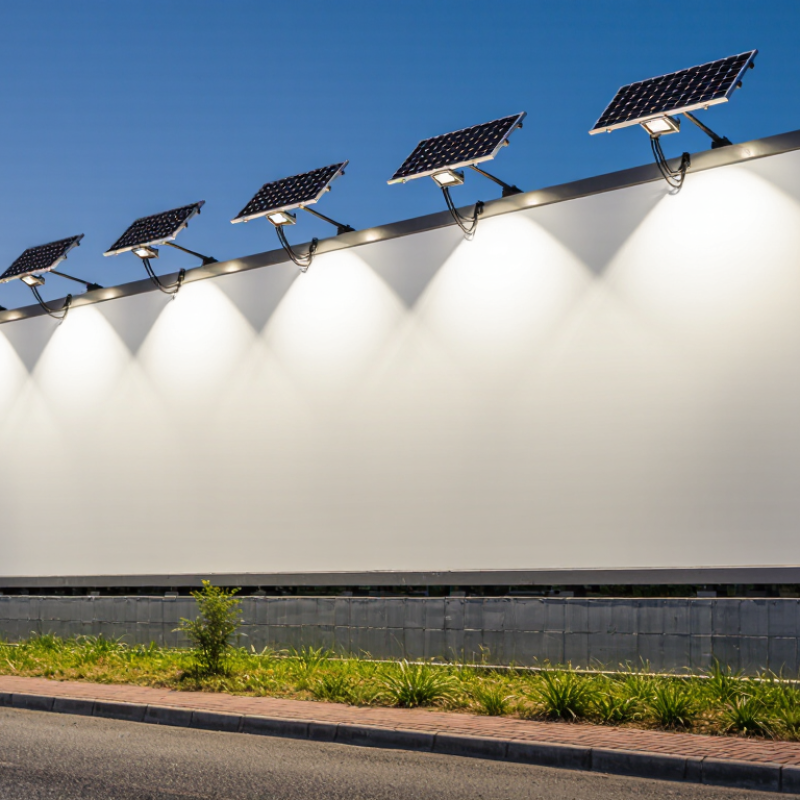
Solar billboard lights turn daylight into stored energy, then use that energy to illuminate a sign after dusk. A photovoltaic panel converts sunlight into electricity, which a charge controller directs to a rechargeable battery. The controller helps prevent overcharging and supplies power to the LED fixture when ambient light falls. Many systems use a photocell, so the light switches on automatically at dusk and off near dawn. Simple in theory. Battery size, panel output, and LED wattage determine how long the sign stays bright. Cloudy days, winter sun, shade from nearby trees, and dust on the panel can reduce charging. That matters.
For a roadside board, installers should angle the panel toward unobstructed sunlight and aim the fixture across the printed surface. Too steep an angle can leave lower corners dim; too much glare can distract drivers. Check the sign after dark, not only at noon. Look for even coverage, secure brackets, and enough battery reserve for several dull days. Real conditions vary. Even a well-sized unit may need seasonal adjustment or occasional panel cleaning. The weak point is often not the lamp, but an overlooked shadow or undersized battery.
Choose a solar billboard light by matching brightness to sign size, not by chasing the highest lumen claim. Check beam angle and mounting height: a narrow beam can leave the sign edges dark, while a wide beam may waste power. Compare panel wattage, battery capacity, and stated runtime together. NREL’s National Solar Radiation Database provides hourly, location-specific solar irradiance data, useful for checking whether a shaded or cloudy site can recharge reliably. The U.S. Department of Energy reports that LEDs use at least 75% less energy than incandescent lighting; efficient LEDs can help extend overnight runtime, though real results depend on system design.
Tip: Look for runtime specified after a full charge, plus a low-sun or cloudy-weather estimate. Check the light’s weather-resistance rating, battery replacement options, and operating-temperature range. A larger panel is not automatically better if trees shade it after noon. That detail is easy to miss.
Before choosing, compare actual sign illumination, not just fixture output. Ask whether the manufacturer’s test describes measured brightness, runtime, and test conditions. If those details are absent, treat the estimate cautiously. I would also check whether the panel can be angled toward open sky while the lamp stays aimed at the sign. It can mean extra mounting work, but may prevent a dim patch by closing time.
Choosing among the 10 best solar billboard lights for outdoor signs starts with the sign itself. A narrow roadside panel needs a different beam pattern from a wide building-mounted display. Check the light’s coverage, brightness settings, and mounting range before comparing battery capacity. A powerful lamp can still leave dark corners if its beam is too narrow. Shade matters.
Panel placement affects daily performance. A panel facing open sky can collect more sunlight than one tucked beneath a roof edge or tree canopy. Look for adjustable mounting so you can angle it toward daylight and direct the lamp onto the sign. Dust, leaves, and bird droppings can reduce charging, so consider whether the panel is easy to reach and clean. It sounds minor. It isn’t.
For signs that must remain visible after cloudy days, compare battery runtime at the brightness level you actually need. Motion or dusk-to-dawn controls may help conserve stored energy, though settings and results vary by product and season. Outdoor lights should list suitable weather protection, and their cables, brackets, and fasteners should feel appropriate for the installation site. Read the specifications carefully; “all night” may depend on full charging and a lower output setting. A practical shortlist balances coverage, charging conditions, battery performance, and straightforward maintenance. The brightest option is not always the most useful.
Mount the light above the billboard and aim it down across the sign face. Set the beam to reach the lower corners without shining into drivers’ eyes or nearby windows. A slight offset can reduce harsh reflections on glossy vinyl. Before drilling, mark the bracket position and test the beam after dark. Check at dusk.
Position the solar panel where it receives direct sun for much of the day, away from tree shadows, rooflines, and sign structures. If the panel can be separated from the lamp, choose its angle for the site rather than the sign’s appearance. NREL’s National Solar Radiation Database provides solar-resource data at 30-minute intervals; use local seasonal data to estimate charging conditions, not just a sunny summer afternoon. Allow for winter shade and cloudy-day battery demand.
Keep cables short, protected, and secured against wind movement. Aim the light, then inspect the sign from several viewing angles; a bright hotspot can leave the edges unreadable. A tidy installation is not always an effective one. Recheck the panel after nearby branches grow, and review the battery runtime after several overcast days. The first adjustment may not be the last.
| Rank | Recommended Setup | Typical Sign Size | LED Load | Suggested Solar Panel | Suggested Battery | Mounting and Positioning | Installation Notes |
|---|---|---|---|---|---|---|---|
| 1 | Compact single-head fixture | Up to 2 × 3 ft (0.6 × 0.9 m) | 10–15 W | 30–50 W | 12 V, 20–30 Ah | Mount above the sign and aim the beam down toward its center. | Suitable for small signs when the panel receives direct sun and the fixture is rated for outdoor use. |
| 2 | Wide single-head fixture | Up to 3 × 6 ft (0.9 × 1.8 m) | 15–25 W | 50–80 W | 12 V, 30–50 Ah | Position centrally above the sign; check that the beam reaches both edges. | Use a wider beam or adjustable head to reduce bright and dark areas. |
| 3 | Two-head sign-light setup | Up to 4 × 8 ft (1.2 × 2.4 m) | 2 × 15 W | 100–150 W | 12 V, 60–80 Ah | Space heads across the sign width and angle them inward slightly. | Keep the panel clear of fixture and sign shadows throughout the day. |
| 4 | Two-head medium-sign setup | Up to 6 × 10 ft (1.8 × 3 m) | 2 × 20 W | 150–200 W | 12 V, 80–100 Ah | Mount heads near the upper corners, aiming light evenly across the face. | Confirm that the mounting structure can support the fixtures and wind loads. |
| 5 | Three-head coverage setup | Up to 8 × 12 ft (2.4 × 3.7 m) | 3 × 20 W | 200–300 W | 12 V, 100–150 Ah | Distribute heads evenly along the top edge and test for uniform coverage. | Use a suitable charge controller and fuse the battery circuit according to component ratings. |
| 6 | Four-head large-sign setup | Up to 10 × 20 ft (3 × 6 m) | 4 × 20 W | 300–400 W | 24 V, 100–150 Ah | Space four heads evenly across the sign and direct them toward the sign face. | A 24 V system can reduce current for a larger load; use compatible controller and wiring. |
| 7 | High-output multi-head setup | Up to 12 × 24 ft (3.7 × 7.3 m) | 4 × 30 W | 400–600 W | 24 V, 150–200 Ah | Use evenly spaced fixtures on a secure top rail; avoid aiming light into drivers’ eyes. | Check local rules on sign brightness, glare, and lighting hours before installation. |
| 8 | Extended-runtime setup | Up to 8 × 16 ft (2.4 × 4.9 m) | 4 × 15 W | 300–450 W | 24 V, 150–200 Ah | Position the panel separately if needed so it faces the sun without shading. | Choose a controller with dusk-to-dawn scheduling or a timer to manage nightly energy use. |
| 9 | Low-sun-season setup | Up to 6 × 12 ft (1.8 × 3.7 m) | 2 × 25 W | 200–300 W | 24 V, 120–180 Ah | Orient the panel toward the equator and tilt it to suit the location and seasonal sun path. | Allow for shorter winter days and several cloudy days when sizing the panel and battery. |
| 10 | Modular billboard-light system | Large signs; final size depends on fixture count | Typically 60–150 W total | Size to the daily energy demand and local solar resource | Size for the required nighttime runtime and backup days | Add fixtures in evenly spaced sections and aim each one to cover its assigned area. | Best for custom installations; calculate energy use from actual wattage, operating hours, and system losses. |
| Planning note: Values are practical starting ranges, not guaranteed product specifications. Actual requirements depend on sign reflectivity, desired brightness, nightly operating hours, shading, local sunlight, temperature, battery chemistry, and system efficiency. Confirm the final design with a qualified installer and follow electrical, structural, and local permitting requirements. | |||||||
Reliable billboard illumination begins with a clean panel and an unobstructed view of the sky. Dust, pollen, bird droppings, and nearby branches can reduce charging, especially after dry or windy weather. Wipe the panel with a soft cloth and water when it looks dirty. Avoid abrasive pads; they can scratch the surface. Small checks matter. Look for loose mounting hardware, cracked cable insulation, and water inside the fixture. Follow the light’s care instructions, and switch it off before cleaning.
Battery performance also deserves attention. Check the battery compartment for corrosion or moisture, but do not open sealed parts. Replace rechargeable batteries only with the specified type. A 2018 National Renewable Energy Laboratory review reported a median photovoltaic-module degradation rate of about 0.5% per year across field studies. That is gradual aging, not a reason to overlook a shaded panel or failing connection. It is easy to blame the battery too soon.
Keep a simple maintenance log: note cleaning dates, cloudy-week performance, and how long the sign remains lit after dusk. Compare results across similar seasons, since winter daylight and temperature affect charging. If brightness drops suddenly, inspect shade and wiring before replacing components. Check again after storms. A small tilt adjustment may help, though it can also expose the fixture to stronger wind. Reassess it.
Match beam coverage to the sign’s width and height. A narrow roadside panel needs different coverage from a wide wall display. Brightness alone can mislead.
Choose a spot with direct sunlight for much of the day. Keep it clear of roof edges, trees, and sign structures. Shade matters.
Aim the beam across the full sign face, including its lower corners. Check the edges after dark; a bright center can hide dim spots.
Compare runtime at the brightness level you plan to use. Cloudy days and limited sunlight can reduce stored energy. “All night” needs context.
They may help conserve battery power, but performance varies by setting, season, and sunlight. Test the actual setup.
Aim it down across the sign, not toward drivers or nearby windows. A slight offset may soften reflections on glossy material. Check at dusk.
Mark the bracket position and test the beam before drilling. Secure cables against wind movement, and make sure the panel can be reached for cleaning.
Remove dust, leaves, and bird droppings when they block sunlight. Recheck after nearby branches grow, then review runtime after several cloudy days. One adjustment may not be enough.
Solar Billboard Lights provide an energy-conscious way to illuminate outdoor signs by collecting sunlight with a panel, storing power in a battery, and using that energy to run LED fixtures after dark. Choosing the right setup involves comparing brightness, beam coverage, battery capacity, panel size, weather resistance, and operating time. The best option depends on the sign’s dimensions, location, and exposure to sunlight, so consider how each light will perform in the conditions where it will be installed.
For effective illumination, position the solar panel where it can receive ample direct sunlight, and aim the light to cover the sign evenly while minimizing glare. Secure the components according to their instructions and check that the panel and fixture remain firmly mounted. Regularly clean the panel, inspect connections and mounting hardware, and monitor battery performance. These simple steps can help maintain dependable lighting and extend the useful life of a solar sign-lighting system.